How Can We Help?
Setting ERO Remote Signature
ERO Remote Signature
Here’s an interactive tutorial
Requirements:
- ERO SSN/PTIN, ERO’s Name, Cell Phone and Cell Phone Carrier (figure 1)
- Desktop Software must have Internet access
- ERO needs to have a smartphone with Internet access
How to capture/update ERO Signature using RemoteSign:
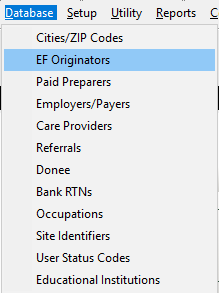
- Login to the desktop software with Administrator privilege, click Database menu and select EF Originator.
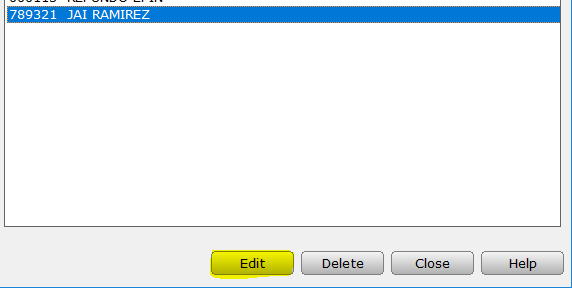
- From the EF Originators window select the EFIN and click Edit button (or double click, save you a click)
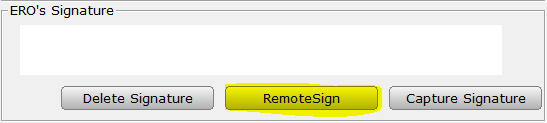
- From the Electronic Return Originator Information window, verify the requirement information are entered then click RemoteSign button.
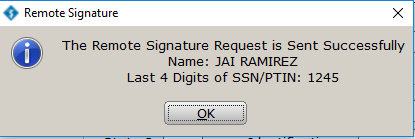
- After clicking the RemoteSign button, Remote Signature Message window will appear, ERO will need these information for authentication. (Name and Last 4 of SSN/PTIN)
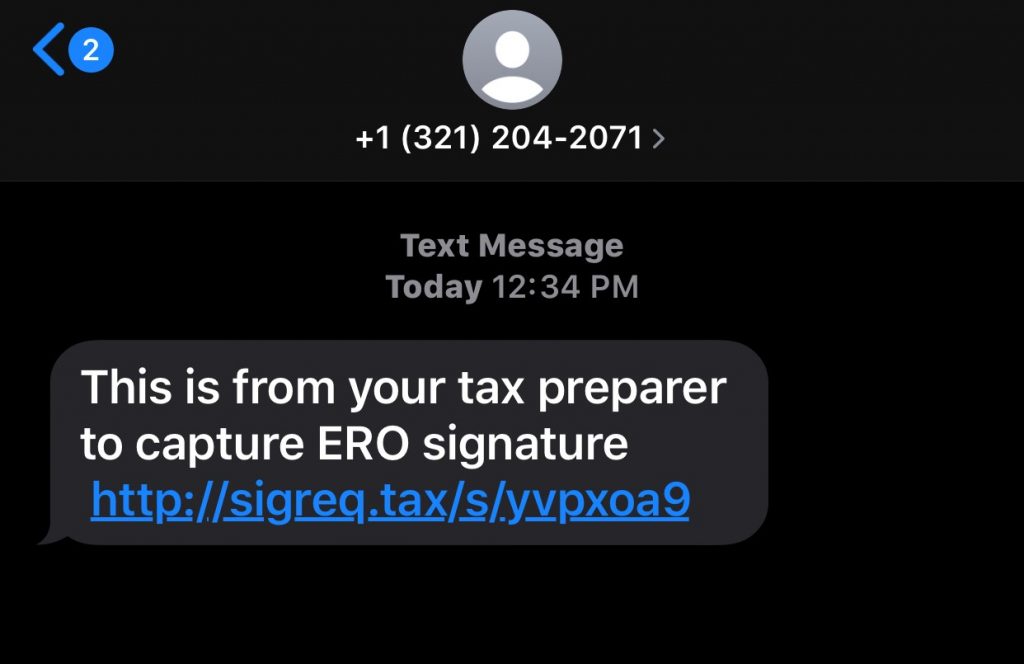
- Software then will send a text message to the ERO’s cell phone number (standard text messaging rate will apply, please remind users if they have a text messaging plan with their provider).
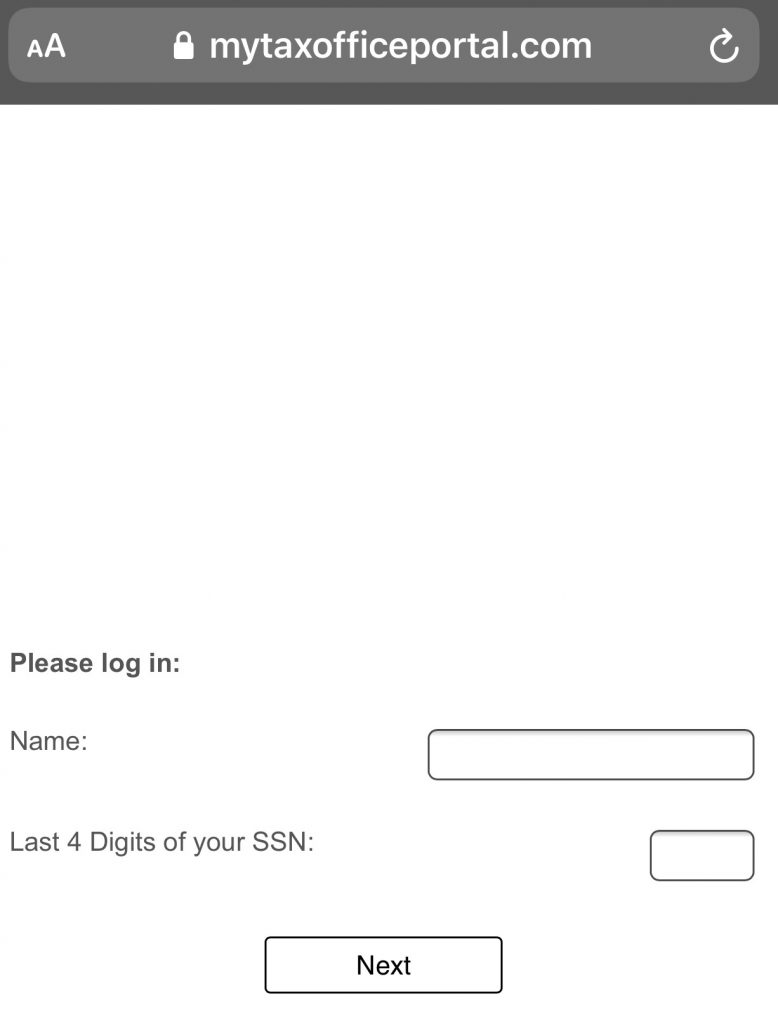
- After clicking the link from the text message, enter the ERO’s name and last 4 digit of SSN/PTIN exactly as what it indicated on Step 4 (else the user will not be authenticated and will be unable to process the signature request).
- After entering information click “Next” and once authenticated, the signature page is next. Note: it is important to turn your mobile device sideways to capture the signature properly.
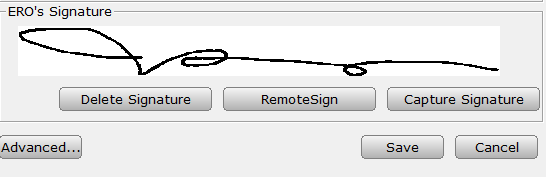
- Once signature is set click Submit button.
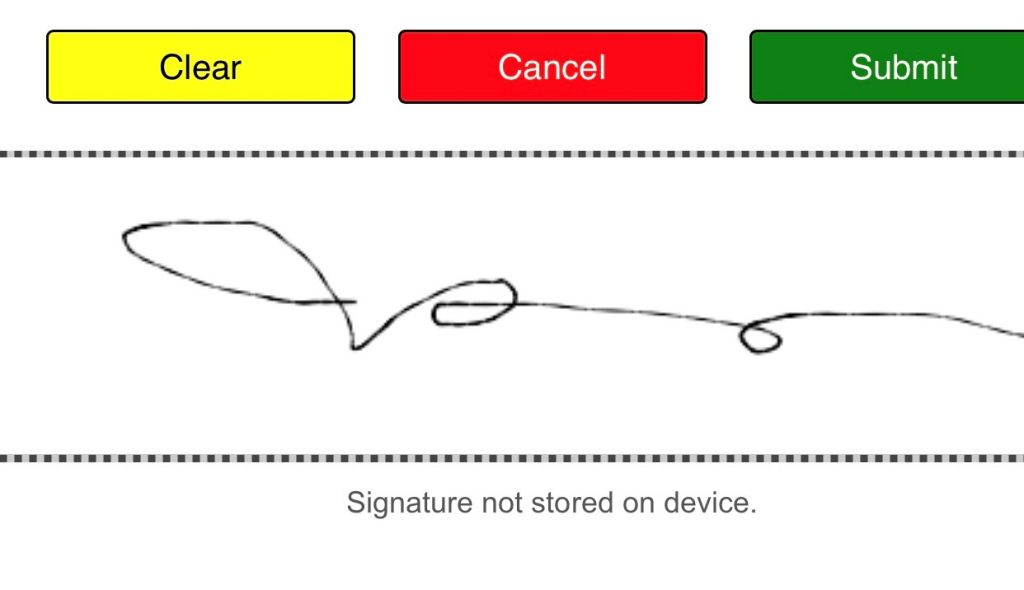
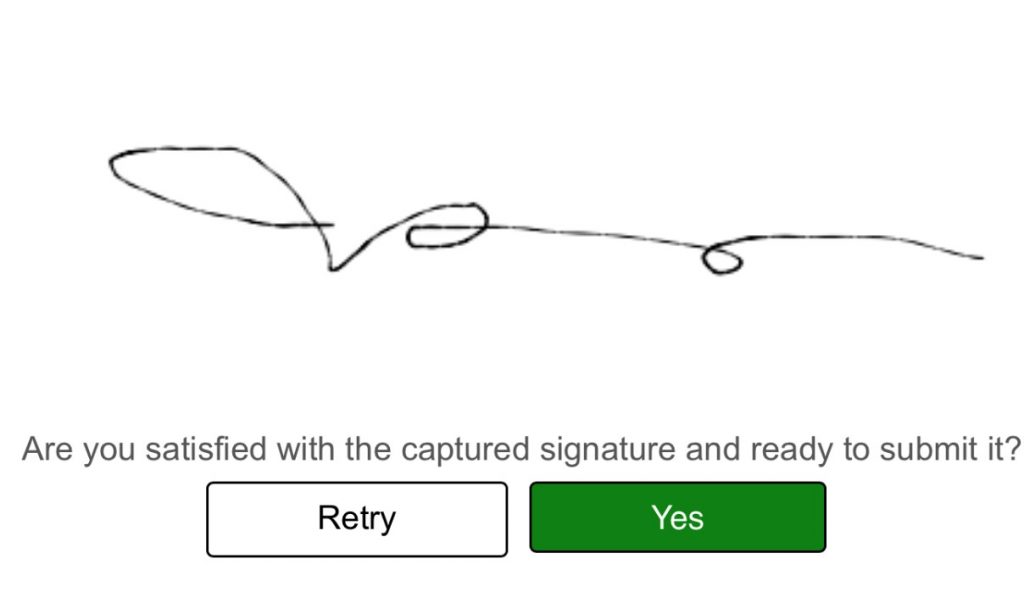
- A verify page will then appear to confirm if preparer is satisfied with the signature, click “No” to go back and recapture signature, click “Yes” to proceed in sending the signature to the desktop software.
- Once submitted, close the Paid Preparer Information window and reopen. Preparer signature should be in place/updated with the new signature.