
How Can We Help?
How to Create a New Tax Return with Client Payment in KIS Online
How to Create a New Tax Return with Client Payment
This article will show you how to create a new return and create the Client Payment.
- Open your KIS Online
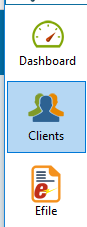
- From the Dashboard click on the Clients icon at the left side of the screen.
- Click on the New Return icon at the top.

- Enter the primary taxpayer’s Social Security Number (SSN)

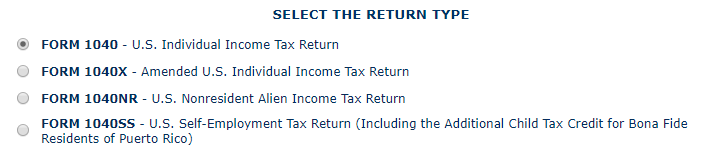
- The Form type is defaulted to a 1040 series return. To change the type of return, select the corresponding form needed for the taxpayer(s).
- Next to the social security number field is an “Apply W-7” box for a primary taxpayer needing to apply for an ITIN. The software would assign an identifying number for tax return preparation purposes if this is selected.
![]()
- Click “SAVE AND CONTINUE” to be taken into the data entry for your new taxpayer.

- The software will open to the Personal Information page where you will enter the taxpayer’s personal information.

- Once you entered all the information you will click Save at the bottom
![]()
- At the left of the screen you can see all the forms available for you to use in creating this return.
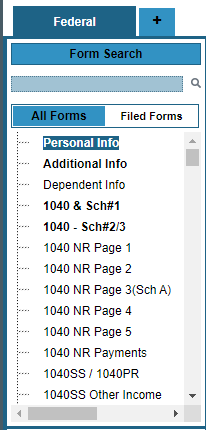
- Click on the form that you wish to add and enter all the information required.
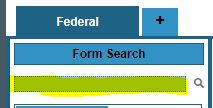
- If you cannot find a form you can enter the name of the form at the top box labeled FORM SEARCH.
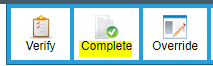
- Once done entering the necessary forms for the return, click on the Complete icon at the top left of your screen.
- If errors are found in the tax return, the software will display the error with a link, “Click here to fix” that would direct you back to the page needing correction.
![]()
- Your other options are to “Close & Correct Errors” without being navigated to the error page or to “Ignore & Continue” (if applicable) which is NOT RECOMMENDED and would result in a REJECTION of the return.

- If the diagnostic does not recognize any errors or you fixed all errors, you will be given the option to mark the return Complete and (You must indicate “Yes” for Complete and Reviewed to be eligible to make Client Payment and to Electronically File.)
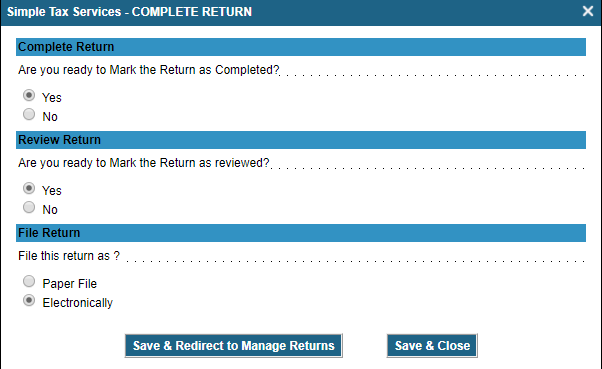
- Click Save & Return to Manage Return and you will then be directed to the Client Manager
- Once the return has been marked Complete and Reviewed, the “Edit Payment” button will appear on the Client Manager screen in the Payment & Efile Details section at the bottom.

- Click Edit Payment to start the invoice.
![]()
- Click Add New Invoice.

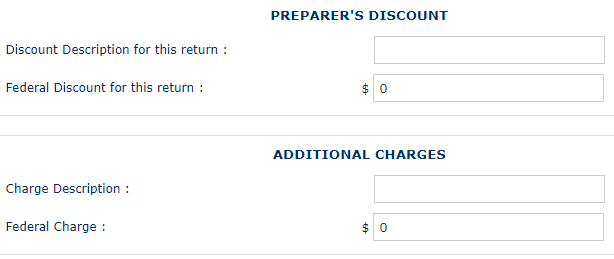
- On the Summary of Charges screen, the software will calculate charges based on the pricing setup of the software.

- You have the ability to “Modify” charges to include discounts or additional fees.

- Add the Additional Charges or Discounts and click CONTINUE.
- Non Banking is for taxpayers paying upfront.
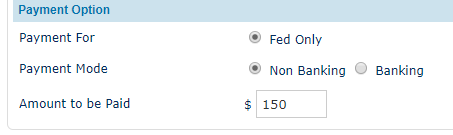
- Banking is if you are enrolled and approved with an authorized banking partner.
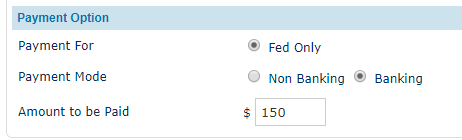
- Once indication is made for how you will be paid for the service, on the bottom left indicate if taxpayer is paying for the service now (Make Payment Now) or if you will Invoice Only (Bill them) for the service.

- Choose if you would like to efile the return now. If yes, once you select “Update Payment” on the bottom right, we will prompt you for electronic filing. If you indicate NO for efile, the return will be ready when you are to directly efile.
