Workstation Setup for Simple TAX 1040
Workstation Setup for Simple TAX 1040
This article will show you how you can share the software from your Server to your Workstation all through your Network.
- Open your File Explorer and click Network
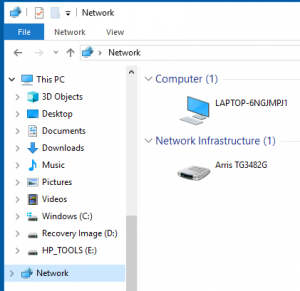
- Select the server name computer and click on it to open
- Click on the Xlink folder (example xlink20)
- Scroll down to the bottom and right click on the xlink32 file.

- Select Send to
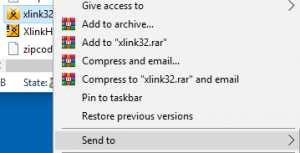
- Select Desktop (create shortcut)

- The icon will appear on your desktop

- Right click on the icon and select Rename to name it (example Simple TAX 1040 2020)
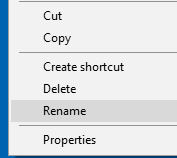
- To change the icon, right click on the icon again and select Properties
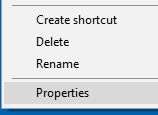
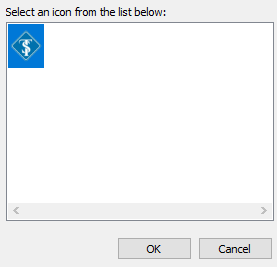
- From the Properties menu click Change Icon...
![]()
- From the Change Icon menu click Browse...

- The xlink folder will open, click on the icons folder.
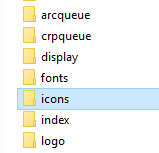
- Select the icon
- Click OPEN

- You will be sent back to the Change Icon menu with the new icon you selected, click OK
- In the Properties menu click APPLY.
![]()
Electronic Signature Setup in KIS Desktop
This article will show you how to Setup the Firm Signature and Preparer Signature in your software.
- Login to your KIS DESKTOP
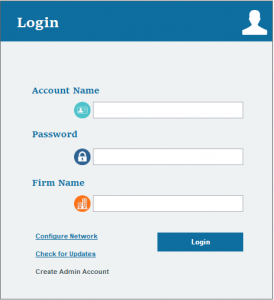
- Click on the SETUP tab at the top right corner.

- Click on the Sig Pad icon on the left side (6th one down).

- On Step 1: Signature Pad Configuration select the Model Name of your signature pad if you have one or select Mouse or Stylus to use your computer’s mouse or a stylus.

- On Select which one to use signature pad, select which signature you want to do first, Firm or Preparer.

- Click START next to the selected signature box.

- Sign inside the box using your mouse or signature pad and click SAVE.

- To sign the other signature box, go back Select which one to use signature pad, select which signature you want to do first, Firm or Preparer.

- Click START next to the selected signature.

- Sign inside the box using your mouse or signature pad and click SAVE.

Electronic Signature Setup on KIS Online
This article will show you how to Setup the Firm Signature and Preparer Signature in your software.
- Login to your KIS ONLINE software.
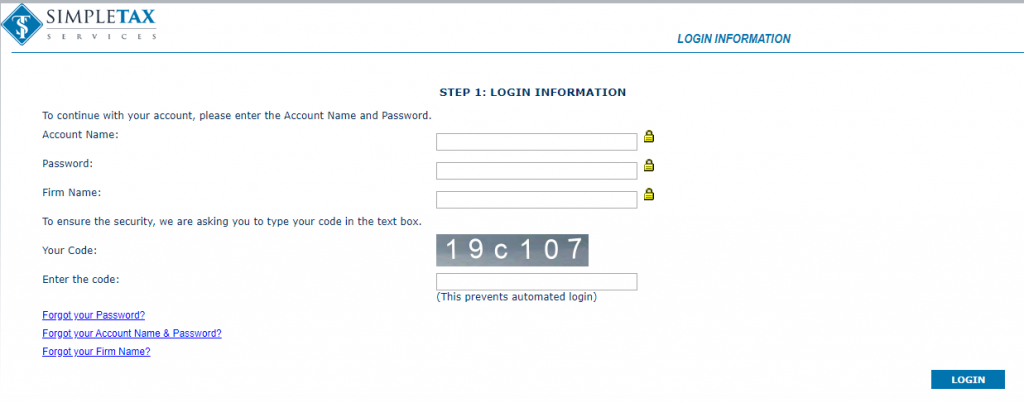
- Click on the SETUP tab at the top right corner.

- Click on the Sig Pad icon on the left side (5th one down).

- On SELECT WHICH ONE TO USE SIGNATURE PAD and select which signature you want to do first, Firm Signature or Preparer Signature.

- Click START under the selected signature box.
![]()
- Sign inside the box using your mouse or signature pad and click SAVE SIGNATURE.
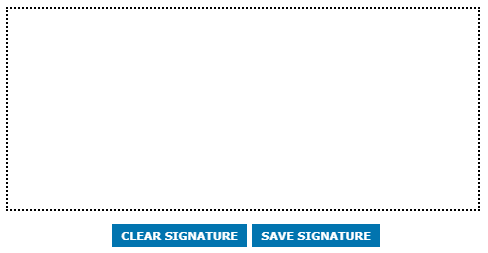
- To sign the other signature box, go back to SELECT WHICH ONE TO USE SIGNATURE PAD and select which signature you want to do, Firm Signature or Preparer Signature.

- Click START under the selected signature.
![]()
- Sign inside the box using your mouse or signature pad and click SAVE SIGNATURE.

NOTE: If you have multiple preparers, you will need to have each preparer sign. You can select the preparer from the Select Preparer drop box under PREPARER SIGNATURE.
How to setup pricing in KIS Online
The objective of this article is to walk you through on how to setup pricing.
- Login to your KIS ONLINE software.

- Click on the seventh icon on the left side labeled PRICING.

- You will see several tabs labeled FEDERAL, STATE, DISCOUNT and ADDITIONAL CHARGES.

On the FEDERAL TAB you got 3 options to choose from FIXED RATE FOR ALL RETURNS, SET PRICE AS PER FORM or SET PRICE MANUALLY AFTER EVERY RETURN.
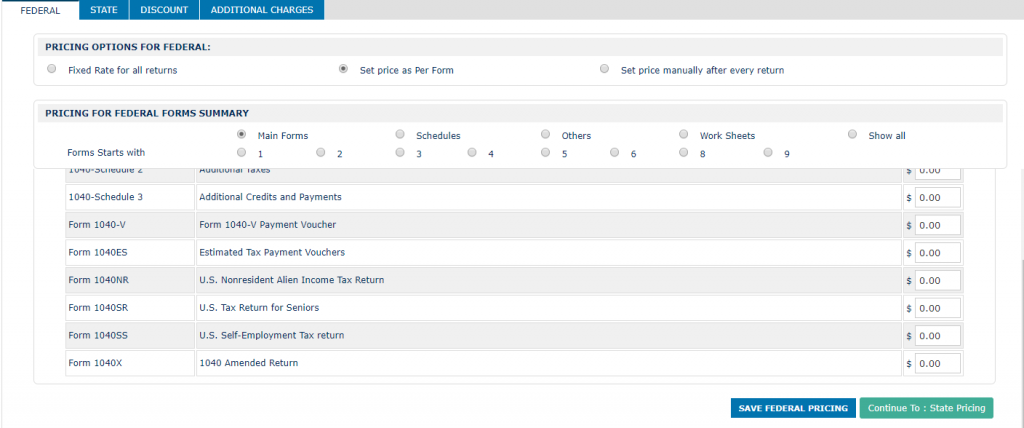
- Click on FIXED RATE FOR ALL RETURNS if you want to charge the exact same amount to all your clients. This will not require you to enter the fee on the client invoice.
- Click SET PRICE AS PER FORM if you wish to charge a different amount depending on the forms you are filling out for each return, This will allow you to charge per Schedule Form, 1040 Form, W-2 and so on.
- Click on SET PRICE MANUALLY AFTER EVERY RETURN if you want to charge a different amount to each client. That fee is set on the Client Invoice.
- On PRICING: FIXED RATE you can enter the amount you want to charge to all your clients across the board for all federal returns. This will not require you to enter the fee on the client invoice.
On the STATE TAB you got 4 options to choose from FIXED RATE FOR ALL STATE RETURNS, SET PRICE FOR EACH STATE, SET PRICE MANUALLY AFTER EVERY STATE RETURN, or SET PRICE FOR ALL FORMS IN EACH STATE.
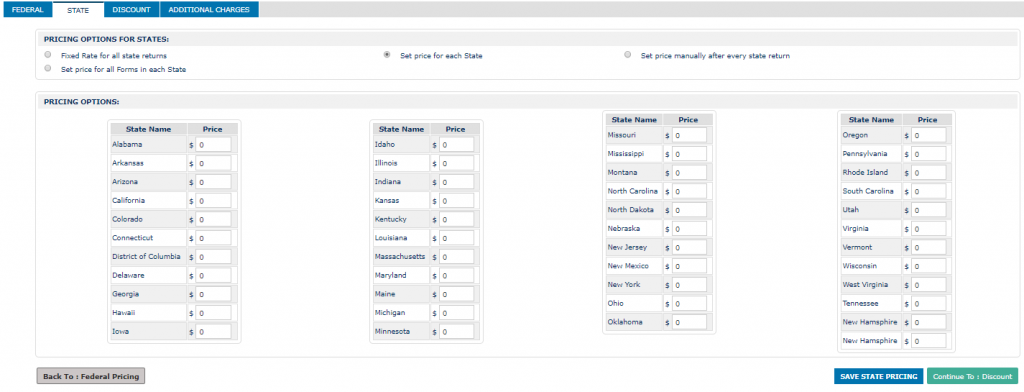
- Click on FIXED RATE FOR ALL RETURNS if you want to charge the exact same amount to all your clients. This will not require you to enter the fee on the client invoice.
- Click SET PRICE FOR EACH STATE to set a different price fee for each individual state.
- Click on SET PRICE MANUALLY AFTER EVERY STATE RETURN if you want to charge a different amount to each client. That fee is set on the Client Invoice.
- Click SET PRICE FOR ALL FORMS IN EACH STATE then select the state from the drop box to set different price fee for each form of each individual state.
- On PRICING: FIXED RATE you can enter the amount you want to charge to all your clients across the board for all state returns. This will not require you to enter the fee on the client invoice.
On the DISCOUNT TAB you will be able to add discounts of your choosing to both FEDERAL and STATE.

- Select either FEDERAL or STATE on the DISCOUNT PRODUCT.
- Click inside the DISCOUNT DESCRIPTION FOR THIS RETURN and enter the name of the Discount you wish to add.
- Now click on the DISCOUNT FOR THIS RETURN box and enter the amount of the discount that will be associated to the discount name.
- Check the box "CHECK HERE TO APPLY THIS DISCOUNT CHARGE DEFAULT TO ALL RETURN" if you want the discount to be applied to all returns by default.
- Click the button ADD DISCOUNT.
- If you need to add more than 1 discounts, keep repeating steps 1-5.
On the ADDITIONAL CHARGES TAB, you will be able to add additional charges to both FEDERAL and STATE, such as the preparation fees i.e. copies, fax, prior year preparations, etc.

- Select either FEDERAL or STATE on the DISCOUNT PRODUCT.
- Click inside ADDITIONAL CHARGES DESCRIPTION FOR THIS RETURN box and enter the name of the Additional Charge.
- Click inside ADDITIONAL CHARGES FOR THIS RETURN box and enter the amount to be associated with the Additional Charge.
- Check the box "CHECK HERE TO APPLY THIS ADDITIONAL CHARGE DEFAULT TO ALL RETURN" if you want the discount to be applied to all returns by default.
- Click the ADD ADDITIONAL CHARGES button.
- If you need to add more than 1 discounts, keep repeating steps 1-5.
How to setup pricing in KIS Desktop
The objective of this article is to walk you through on how to setup pricing.
- Login to your KIS DESKTOP software.
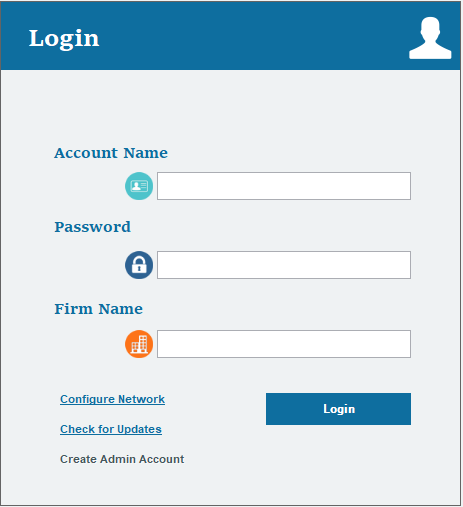
- Click on the seventh icon on the left side labeled PRICING.

- You will see several tabs labeled FEDERAL, STATE, DISCOUNT and ADDITIONAL CHARGES.
![]()
On the FEDERAL TAB you got 3 options to choose from SET PRICE MANUALLY AFTER EVERY RETURN, FIXED RATE FOR ALL RETURNS or SET PRICE AS PER FORM, ITEM AND PROPERTY.
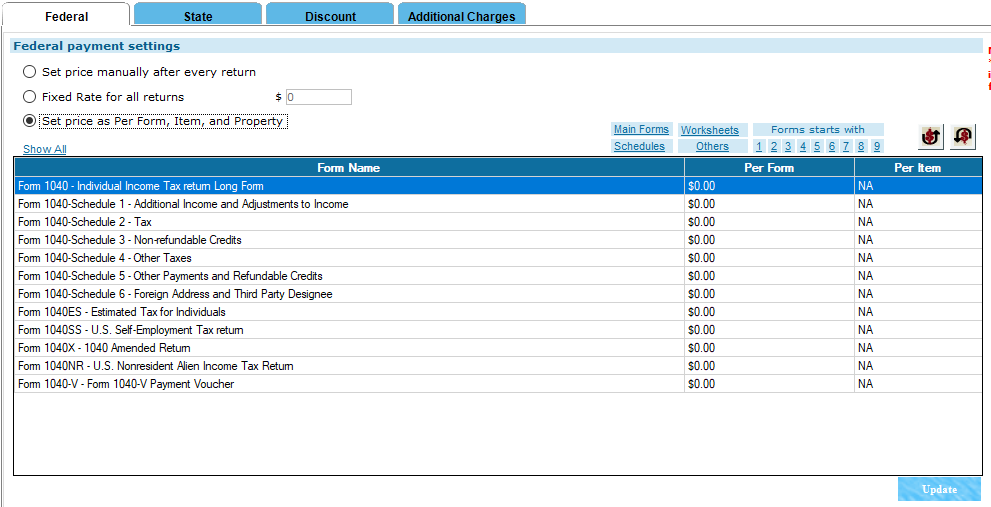
- Click on SET PRICE MANUALLY AFTER EVERY RETURN if you want to charge a different amount to each client. That fee is set on the Client Invoice.
- Click on FIXED RATE FOR ALL RETURNS if you want to charge the exact same amount to all your clients. This will not require you to enter the fee on the client invoice.
- Click SET PRICE AS PER FORM, ITEM, AND PROPERTY if you wish to charge a different amount depending on the forms you are filling out for each return, This will allow you to charge per Schedule Form, 1040 Form, W-2 and so on.
On the STATE TAB you got 4 options to choose from SET PRICE MANUALLY AFTER EVERY RETURN, FIXED RATE FOR ALL STATE RETURNS, SET PRICE FOR EACH STATE, or SET PRICE FOR ALL FORMS IN EACH STATE.
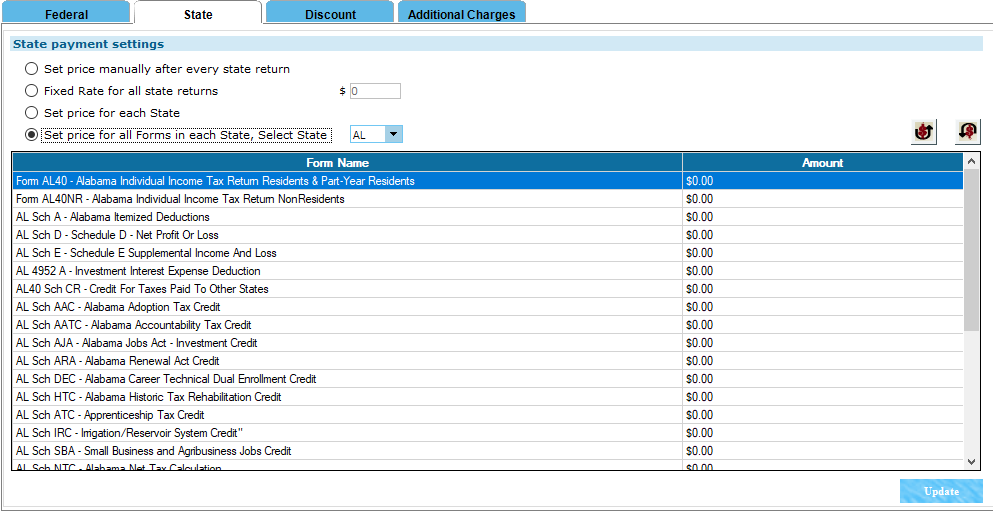
- Click on SET PRICE MANUALLY AFTER EVERY RETURN if you want to charge a different amount to each client. That fee is set on the Client Invoice.
- Click on FIXED RATE FOR ALL RETURNS if you want to charge the exact same amount to all your clients. This will not require you to enter the fee on the client invoice.
- Click SET PRICE FOR EACH STATE to set a different price fee for each individual state.
- Click SET PRICE FOR ALL FORMS IN EACH STATE then select the state from the drop box to set different price fee for each form of each individual state.
On the DISCOUNT TAB you will be able to add discounts of your choosing to both FEDERAL and STATE.
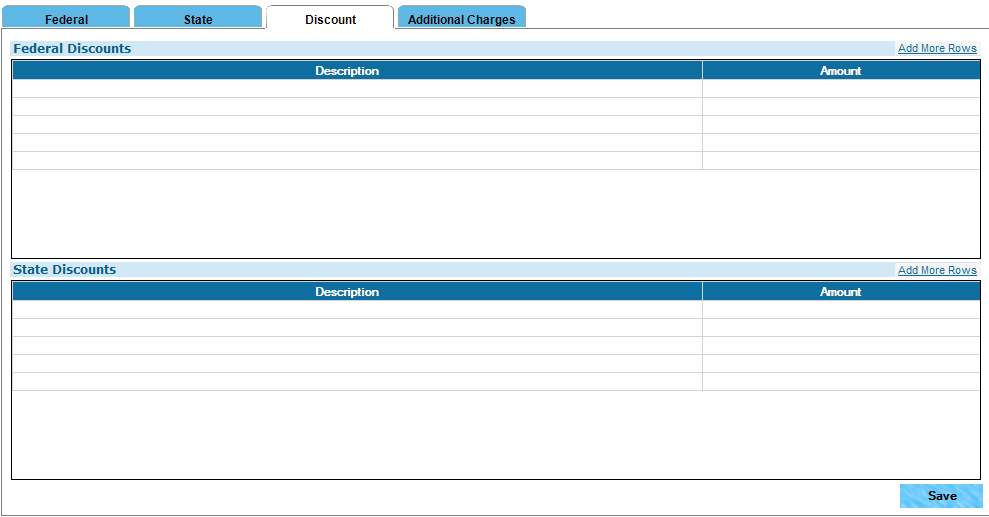
- Click inside the box under DESCRIPTION on either FEDERAL DISCOUNT or STATE DISCOUNT and enter the name of the Discount you wish to add.
- Now click on the box under AMOUNT and enter the amount of the discount that will be associated to the discount name.
- If you need to add more than 5 discounts, then to the right of the FEDERAL DISCOUNT and STATE DISCOUNT you can click where it says ADD MORE ROWS.
- Once you added all the discounts you want, click on the blue SAVE button at the bottom of your screen.
On the ADDITIONAL CHARGES TAB, you will be able to add additional charges to both FEDERAL and STATE, such as the preparation fees i.e. copies, fax, prior year preparations, etc.
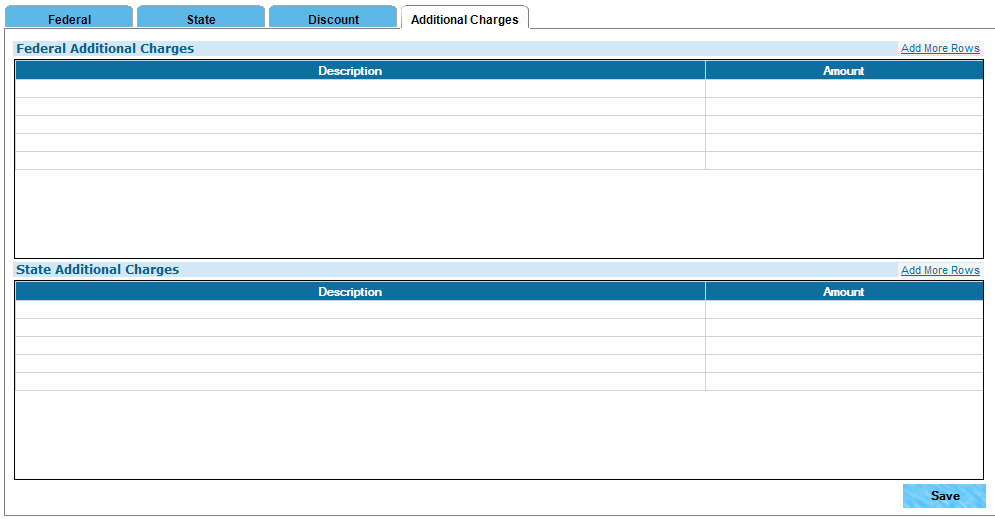
- Click inside the box under DESCRIPTION on either FEDERAL ADDITIONAL CHARGES or STATE ADDITIONAL CHARGES and enter the name of the Additional Charge you wish to add.
- Now click on the box under AMOUNT and enter the amount of the Additional Charge that will be associated to the Additional Charge name.
- If you need to add more than 5 Additional Charges, then to the right of the FEDERAL ADDITIONAL CHARGES and STATE ADDITIONAL CHARGES you can click where it says ADD MORE ROWS.
- Once you added all the Additional Charges you want, click on the blue SAVE button at the bottom of your screen
Setting up Direct Input or Interview Input in KIS Online
The objective of this article is to walk you through on how to set up Direct Input or Interview Input.
- Login to your Keep It Simple Online software.

- Click on the SETUP tab at the top right corner.

- Click on the Settings icon on the left side of the screen, it is the third icon from the top.

- Under PREPARER/CLIENT LEVEL you will see where it says Return Entry Mode. From there select if you want Default Direct Input where you will enter everything directly into the forms or Default Interview Input where you will answer questions to enter the information on the return.
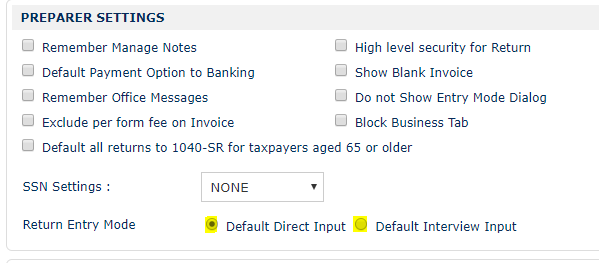
- Click the blue button at the bottom of the screen that is labelled SAVE CHANGES.

- You can set each preparer separately, HOWEVER, if you want all preparers under the same input you can scroll down to the bottom of the page and check the box next to “Do you want to update the same configuration for more users?”

- Then select the preparers you want to update with the same configurations by checking the box next to each preparer name at the top of the screen under ACCOUNT NAME and click USE.
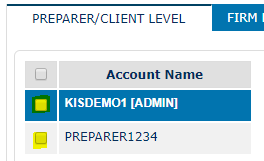
- If you wish to set each preparer differently then DO NOT check the box to update the same configuration for more users and instead click the blue button labelled SAVE CHANGES and then click on the green button labelled CONTINUE TO PREPARERXXX.

How to Setup and Print a TEST CHECK in KIS Desktop
The objective of this article is to walk you through the process of The Check Setup Process.
- Click on the KIS Desktop icon and login to the software.

- Click on the SETUP Tab on the top right corner.

- Click on the 5th icon on the left-hand side labeled CHECK PRINT.

- Click on the SETUP Tab on the CHECK PRINT window.

- Enter a CONFIGURATION NAME and check the box to use the configuration as default.

- At the bottom of your screen on the left-hand side, click PRINT SAMPLE CHECK to print a Test Check so you can figure out the correct way to place your checks in your printer to print them for your customers. We DO NOT recommend using an actual check for this, make a copy of a check and use that copy instead.

- If the bottom portion of the check needs to be adjusted to correct alignment issues, use the CASHIERS CHECK adjustment box to adjust your print settings.
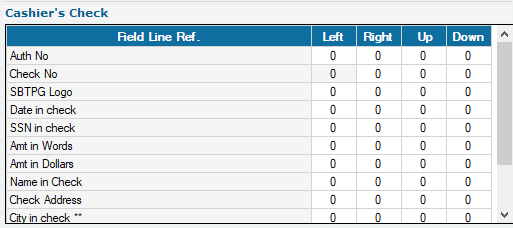
- Print a test check again and if the check prints correctly, click on ADD NEW CONFIGURATION to save the changes made.
![]()
How to complete the Electronic Filing tab of the office setup screen
26 STEPS
1. Once you login to the software, the Software Setup Wizard will appear. Click Office
2. Click E-Filing
3. Enter yore EFIN in the Default EFIN
4. Click Overrides
5. Enter your Company Name
6. Type in your Company Address
7. Type in the City
8. Type in the State
9. Type in rthe Zip Code
10. Type in Company Phone Number
11. Enter the ERO's Name
12. Enter the Firm Address
13. Enter the City
14. Enter the State
15. Enter the Zip Code
16. Click Defaults
17. Click check box Auto-save return when closed. This will automatically save the return whenever you close the return or software.
18. Click General
19. If you had the same software the previous year, enter the Prior Year Path or click Browse to select if from your PC.
20. Click OK
21. Click Auth/Audits
22. Here you can use each button to configure Diagnostic validation checks if you like to know how check out our Software Setup Wizard for Audit Control video. Click OK to continue.
23. Click TextMsg/Email
24. Enter your Gmail Email Address
25. Enter the Password to the Gmail Email Address above.
26. Click OK
Here's an interactive tutorial
https://www.iorad.com/player/1691107/Software-Setup-Wizard-for-Office-Setup
To complete the Electronic Filing tab, follow these steps:
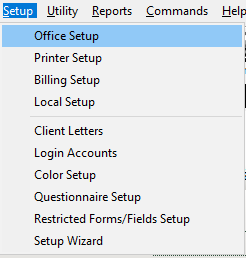
- On the Setup menu, click Office Setup.
- On the Electronic Filing tab, complete the information as follows:
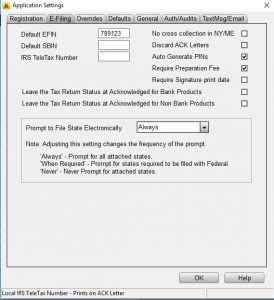
Field
Description
Default EFIN
Type your default electronic filing identification number (EFIN). An EFIN is assigned to you by the IRS when you complete and file Form 8633, Application to Participate in the e-file Program.
Auto Generate PINs
Select this check box to automatically generate PINs for Form 8879.
Require Preparation Fee
Select this check box if you want to prevent returns with a bank product from being transmitted with $0 Preparation Fee.
Prompt to file state electronically
Select one of the following options:
- Always: The user will be prompted by a Verify Error when the return is transmitted if a State Electronic Filing Signature Document (Form 8453) is missing. This will always occur regardless of whether the state return must be electronically filed.
- When Required: The user will be prompted by a Verify Error when the return is transmitted and the state return is required to be filed with the federal return, if a State Electronic Filing Signature Document (Form 8453) is missing.
- Never: The user will not be prompted under either circumstance.
- When finished, click OK.
How to complete the Registration tab
How to complete the Registration tab
SUMMARY
This article demonstrates how to complete the Registration tab of office setup.
MORE INFORMATION
26 STEPS
1. Once you login to the software, the Software Setup Wizard will appear. Click Office
2. Click E-Filing
3. Enter yore EFIN in the Default EFIN
4. Click Overrides
5. Enter your Company Name
6. Type in your Company Address
7. Type in the City
8. Type in the State
9. Type in rthe Zip Code
10. Type in Company Phone Number
11. Enter the ERO's Name
12. Enter the Firm Address
13. Enter the City
14. Enter the State
15. Enter the Zip Code
16. Click Defaults
17. Click check box Auto-save return when closed. This will automatically save the return whenever you close the return or software.
18. Click General
19. If you had the same software the previous year, enter the Prior Year Path or click Browse to select if from your PC.
20. Click OK
21. Click Auth/Audits
22. Here you can use each button to configure Diagnostic validation checks if you like to know how check out our Software Setup Wizard for Audit Control video. Click OK to continue.
23. Click TextMsg/Email
24. Enter your Gmail Email Address
25. Enter the Password to the Gmail Email Address above.
26. Click OK
Here's an interactive tutorial
https://www.iorad.com/player/1691107/Software-Setup-Wizard-for-Office-Setup
To complete the Registration tab, follow these steps:
- On the Setup menu, click Office Setup.

- Complete the information as follows:
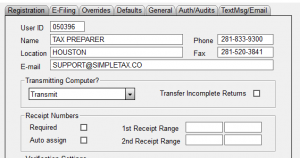
- User ID
Do not edit this field. This field will be populated with the userid used during the First Time Setup Wizard. - Name
Type the company name of the office. - Phone
Type the phone number of the office. - Location
Type the address of the office. - Fax
Type the fax number of the office, if applicable. - E-mail
Type the e-mail address of the office, if applicable.
How to set up Simple Tax 1040 to charge the same tax preparation amount for every return you prepare
How to set up SimpleTAX 1040 to charge the same tax preparation amount for every return you prepare
SUMMARY
This article demonstrates how to set up SimpleTAX 1040 to charge the same tax preparation amount for every return that you prepare (flat rate billing).
MORE INFORMATION
25 STEPS
1. Click Billing
2. Click the check box for No Prior Year Balance or Invoice
3. Click the check box for No Prior Year Preparation Fee on Invoice
4. Click Form Billing
5. Enter your prices under Per Item column
6. Select a State to add your Preparation Fees to the State Forms from the drop down menu.
7. Click Worksheet
8. Enter your prices under Per Item
9. Select a State to add you Preparation Fees to the State Forms fro,m the drop down menu.
10. Click Line Items
11. Enter your prices under Per Item
12. Select a State to add Preparation Fees to the State Forms from the drop down menu.
13. Click Discounts
14. Enter a Discount Name
15. Enter a Discount Percentage or Discount Amount
16. Click Custom Charges
17. Enter Charge Description
18. Enter Amount
19. Click Custom Settings
20. Audit Assistance, Protection Plus is automatically being added to each return, If you wish to NOT have it add automatically un-check the boxes.
21. If you wish to keep Audit Assistance, Protection Plus automatically being added and want to add your fee for the product, you can enter your fee up to $55 in the Add On Fee/Mark Up Amount.
That additional fee is paid to you as the preparer.
22. Click OK
23. Enter the name of the new Billing Scheme.for this Tax Season.
24. Click OK
25. You will get a message stating "There is no default billing Schena Selected. Do you wish to set current schema as default?" Click Yes and you are Done!
Here's an interactive tutorial
https://www.iorad.com/player/1691149/Software-Setup-Wizard-for-Billing
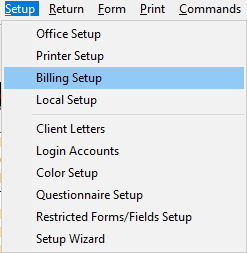
- On the Setup menu, click Billing Setup.
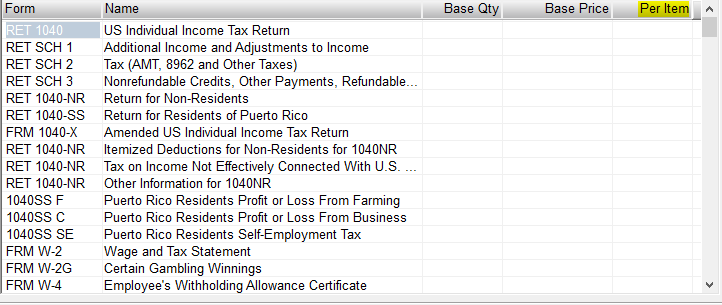
- Click the Form Billing tab.

- Type your tax preparation fee in the 1040 row in the Per Item column.
- Click OK.

Note: On any returns created prior to this setup, open the return and click on "RETURN" at the top Menu and then click "Re-load Billing" from the drop down menu to set the billing for that return.
